Getting Started
Pick a setup method and you'll be reading in minutes.
Docker is the easiest way to run pi-tree — no Node.js, no build tools.
Prerequisites
1. Pull the image
docker pull ghcr.io/shuowu/pi-tree:latest2. Create your .env file
Create a .env file with your provider and API key:
PI_PROVIDER=deepseek
PI_API_KEY=your-api-key-here
PI_MODEL=deepseek-v4-flash
See Models & Providers for other providers and local model setup.
3. Run the container
docker run -d --name pi-tree \
  --env-file .env \
  -p 3847:3847 \
  -v ~/.local/share/pi-tree:/data \
  ghcr.io/shuowu/pi-tree:latest
4. Verify
Open http://localhost:3847 — Docker serves both the frontend and API on a single port. You should see the Library page.
Check the logs if something looks wrong:
docker logs pi-treeConfiguration
Port: 3847 by default. Change with -p <port>:3847 or set PORT in .env.
Data: All state (database, sessions, library, custom skills) is stored in /data inside the container. The -v ~/.local/share/pi-tree:/data flag maps it to a directory on your host machine, so data persists across container upgrades and restarts.
Environment variables:
| Variable | Required? | Default | Description |
|---|---|---|---|
PI_PROVIDER | Yes | — | deepseek, google, anthropic, openai, zhipu |
PI_API_KEY | Yes | — | API key for your provider |
PI_MODEL | Yes | — | Model ID (e.g., deepseek-v4-flash) |
PI_BASE_URL | No | Provider default | Custom base URL (proxies, local models) |
PI_LOOKUP_MODEL | No | Same as PI_MODEL | Cheaper model for dictionary lookups |
PORT | No | 3847 | Server port |
💡 Using a local model (Ollama / LM Studio)? Docker containers can't reach
localhoston your host machine. See Self-Hosting — Local LLM for the networking setup.
For the full env var list, see Self-Hosting — Environment Variables
Build from source (optional)
If you prefer to build the Docker image yourself, clone the repo and run:
git clone https://github.com/shuowu/pi-tree.git
cd pi-tree
cp .env.example .env   # edit with your API key
docker compose up --build
Advanced Docker Compose examples (custom skills, MCP servers, local LLMs, multi-provider) → Self-Hosting — Docker Compose
First Launch
Once pi-tree is running (any setup option), the first-time experience is the same:
1. Create your identity — On your first visit, you'll see a user picker. Enter a username and display name. This is stored locally — no account or sign-up needed.
2. Add a source — Click Add Source in the Library. You'll see tabs for each supported content type — upload a file, paste a URL, or add a feed. Pick whichever you'd like to try first.
3. Start a conversation — Open your source and start chatting. The AI reads the content with you, branching the conversation into a navigable tree as you explore different topics.
TIP
See Features for a visual tour of all supported source types and what each session looks like.
Changing models later
You can switch the model, provider, or API key at any time through the Settings page — no restart needed. For multi-provider setups (e.g., Ollama + DeepSeek), see Self-Hosting — Multi-Provider.
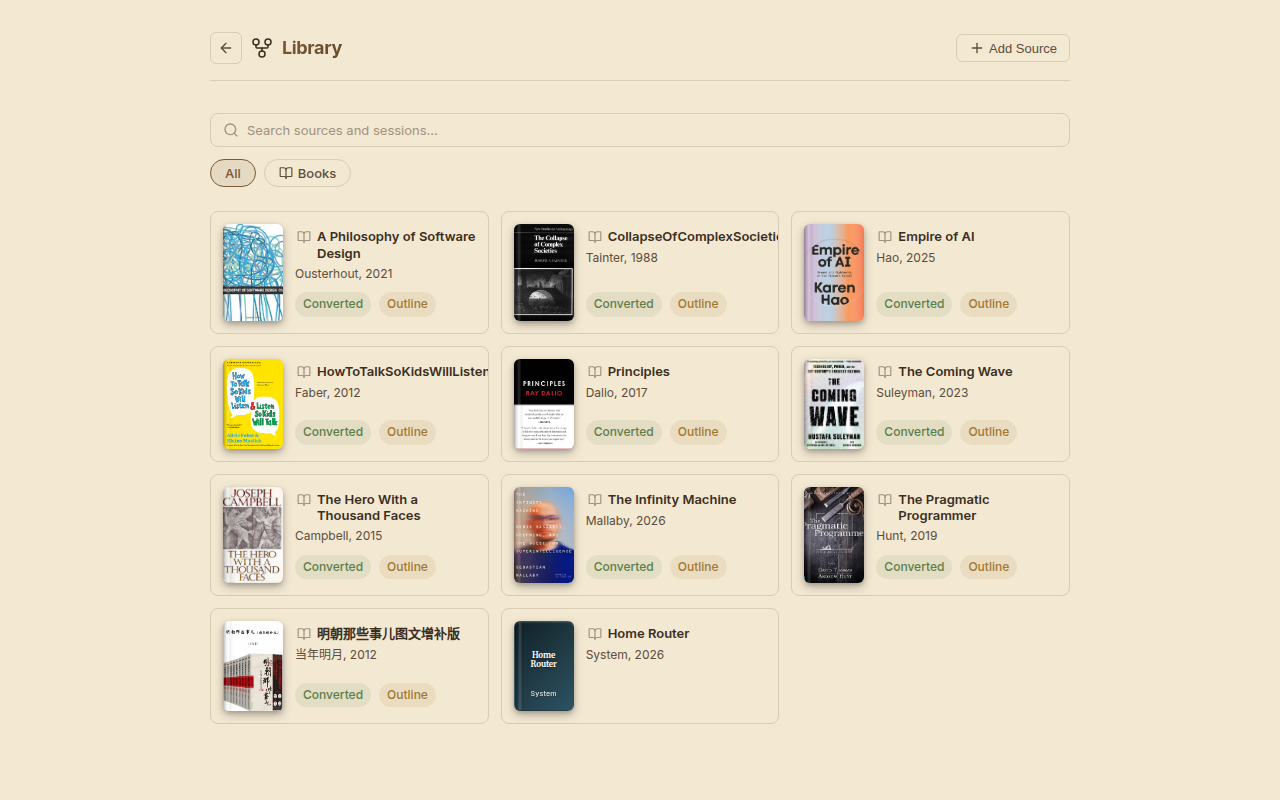
What You'll See
The Library — your collection of sources:
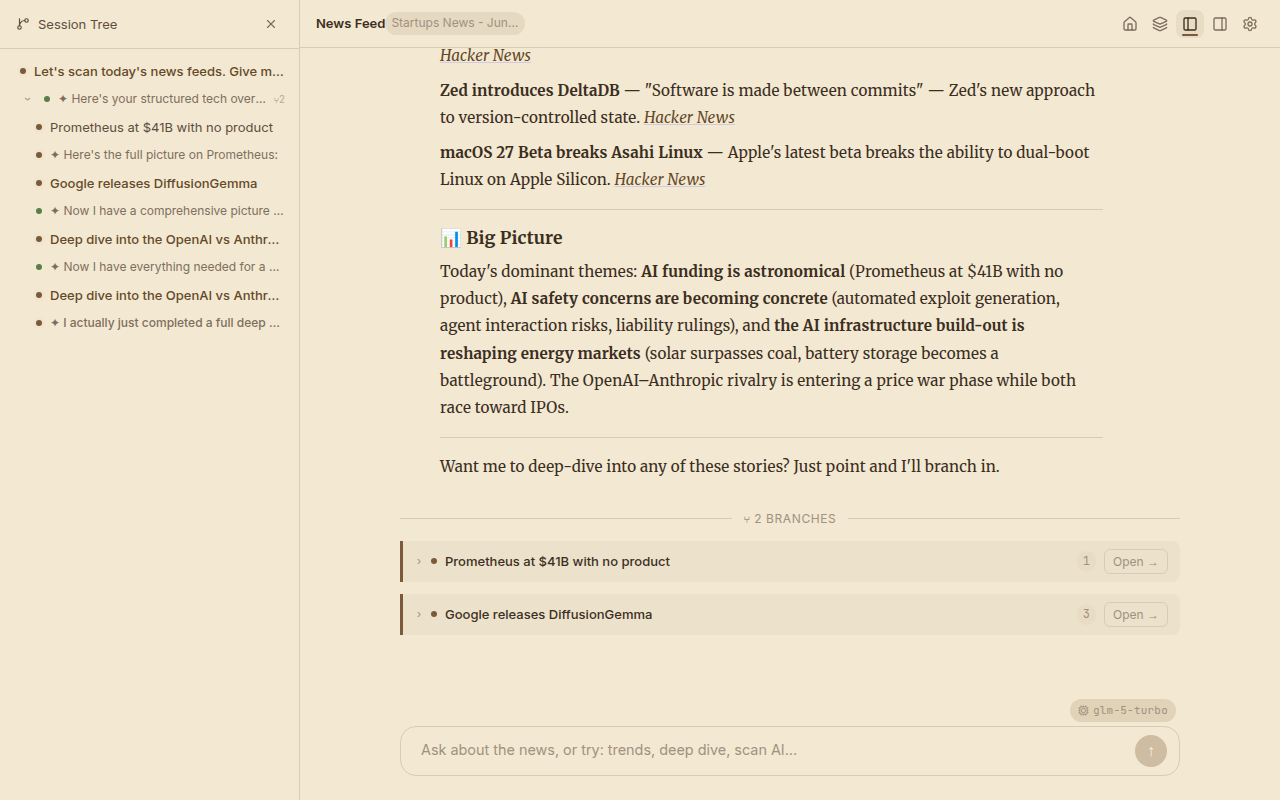
A Reading Session — tree sidebar, AI conversation, and branch cards:
What's Next?
- Features — Visual tour of all source types and capabilities
- Models & Providers — Configure cloud APIs, local models, or multi-provider setups
- Self-Hosting — Docker Compose, env vars, data layout, custom skills, extensions, and MCP integration
- Plugin Guide — Custom skills, session profiles, and full plugin development